
♥ Happy Halloween ♥
It's that time of year where all things spooky come out at night!
We love Halloween, or any excuse to dress up, but organising a costume can be hard work.
We have put together four easy to do costumes / facepaint ideas for any last minute costumers.
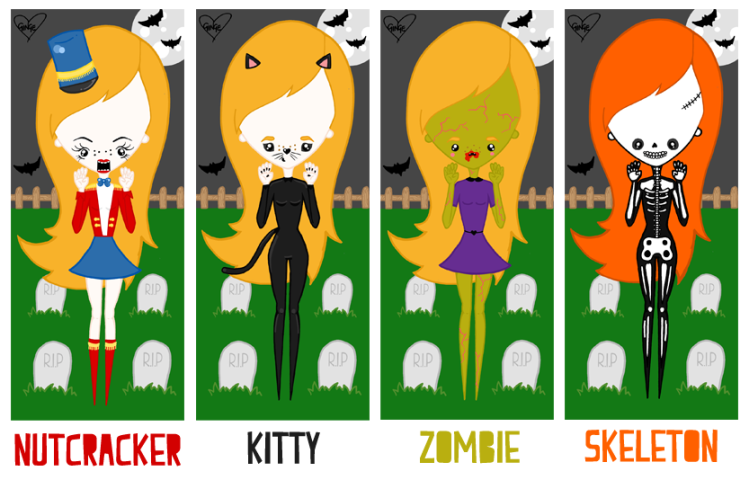
My favourite costume is the Nutcracker, that's what I'll be dressing up as. I'll add some photos of the finished outfit!
 |
| Creeepy! |
♥ Start by painting your face white with the facepaint and line your eyes with the white eyeliner.
♥ Stick some eyelashes on your top and bottom lashes.
♥Colour your top lip with red lipstick
♥ Draw some teeth on your bottom lip.
♥ Colour your chin in black. Leaving space at the bottom of your chin to draw another set of teeth and a bottom lip, to give the illusion of a Nutcracker's chops.
Your outfit doesn't need to be fancy. Try stick to blue and red. A red top and blue pants or skirt, stick some gold tassels on if you can find some. Pop a bow tie on too.
 |
| Meooow! |
♥ Colour your eyelids in with the grey eyeshadow, line them with the black eyeliner. Optionally pop some false lashes on your top eyelid.
♥ Draw a little heart shape on the tip of your nose and some whiskers on your cheeks.
♥ Pop on some spooky black lipstick.
♥ Colour your nails in with the black nail varnish.
For the outfit, you could make a set of ears out of fake fur or felt, and stick them to a headband. Uses left over material to make a tail and stick it to your pants. Wear black leggings and a black top to finish your Kitty outfit.
 |
| Brainsssss! |
♥ Colour your entire face with green facepaint (and your limbs if you're daring enough)
♥ Use the red lip liner to draw some veins on.
♥ Use the red lipstick to colour some 'blood' around your chops, to make it look like you've been munching on the living.
Since zombies are just people that have magically come back from the dead, you can wear anything.
Super handy for a last minute costume.
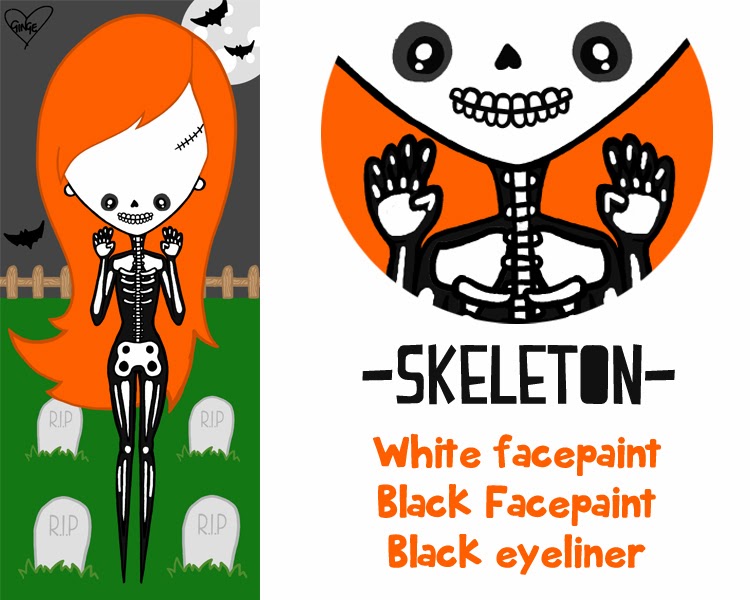 |
| Bones, Bones, Bones. |
♥ Colour your face in with white facepaint. (Including your lips.)
♥ Colour your eye sockets in with black facepaint, and draw an upside down heart for your nose socket.
♥ Draw on some teeth on your lips that extend across your cheeks.
♥ If you're a clumsy clops, draw a few cracks on your forehead.
You could go all out and buy a long black t-shirt and black leggings and draw some bones on them. Or wear regular clothes and draw some bones on your hands.
Voilà!
Hope these are helpful. What are you upto this Halloween?
If you're staying in this Halloween, we recommend watching Braindead, Toxic Avenger or Night of the Living Dead, they will sure give you plenty of scares!
♥


